August 11, 2026 — For millions of fitness enthusiasts, desk workers, and active individuals alike, tight hips are a persistent, frustrating companion. Traditional remedies—such as the ubiquitous Pigeon Pose, Deep Squats, or aggressive lunges—are often prescribed as the gold standard for hip mobility. Yet, a growing number of practitioners report a counterintuitive phenomenon: stretching aggressively for tight hips often leaves muscles feeling even more clenched, fatigued, and strained than before.
According to movement and yoga specialists, the culprit lies in the nervous system. When hip openers are approached with too much muscular engagement and intensity, the body’s natural stretch reflex can trigger a protective contraction, fighting against the very release the practitioner is trying to achieve.
The antidote to this cycle of tension is not more effort, but less. Enter passive yoga—a restorative approach that leverages gravity, supportive props, and prolonged holds to invite the nervous system to truly let go.
Main Facts: The Shift From Active Strain to Passive Recovery
The core philosophy of passive yoga for the hips centers on shifting from muscular exertion to gravity-led surrender. While active stretches require engagement to stabilize joints and build strength, passive variations allow the surrounding musculature—including the glutes, hamstrings, inner thighs, and stubborn hip flexors—to gradually lengthen without resistance.
The Nervous System Connection: Passive stretching signals to the brain that the body is safe, suppressing the stretch reflex and allowing deep-seated muscle fibers to soften.
The Role of Props: Utilizing everyday items like yoga straps, bathrobes ties, bolsters, foam rollers, or blocks creates a supportive environment that optimizes recovery and ensures joints are not over-extended.
Versatility: These practices can function as an intelligent warm-up before intense workouts, a soothing cool-down after running or heavy lifting, or a relaxing bedtime routine practiced directly in bed.
Chronology: Understanding the Evolution of Hip Recovery
For decades, the fitness and wellness industry prioritized aggressive flexibility training, often adopting a "no pain, no gain" ethos regarding deep stretches like the full split or intense pigeon variations.
Early 2000s: Dynamic stretching and high-intensity yoga flows dominated fitness culture, with an emphasis on pushing ranges of motion through muscular force.
2010s–2020s: Physical therapists and restorative yoga instructors increasingly highlighted the dangers of over-stretching the hip capsule and labrum, pivoting toward functional mobility and neuromuscular control.
Present Day (2026): Wellness paradigms have shifted heavily toward nervous system regulation. The modern approach acknowledges that tight hips are frequently guarded by a stressed nervous system, making restorative, prop-supported, passive movements essential for long-term tissue health and tension relief.
Supporting Data: The Anatomy of Hip Tightness
The human hip joint is a multi-directional ball-and-socket structure governed by a complex web of muscles. When we sit for prolonged periods—a hallmark of modern sedentary lifestyles—the hip flexors (primarily the iliopsoas) shorten, while the gluteal muscles weaken and lengthen in a state of chronic inhibition.
Muscle Groups Involved: Effective hip relief cannot focus on the hip flexors alone; it must address the glutes, hamstrings, tensor fasciae latae (TFL), and adductors (inner thighs).
The Gravity Factor: Clinical studies on passive stretching demonstrate that holding a stretch at a lower intensity for a longer duration yields superior plastic (permanent) lengthening of connective tissue compared to short, high-intensity pulls.
Proprioceptive Feedback: Introducing props reduces the activation of muscle spindles (sensors that detect changes in muscle length), preventing the reflexive contraction that causes post-stretch soreness.
Official Responses and Expert Insights
Physical therapists and certified yoga instructors widely endorse incorporating passive movements into daily routines to counteract the physical toll of modern living.
"When people experience chronic hip tightness, they almost always try to muscle their way out of it," notes physical therapy consultant Dr. Elena Vance. "The hip complex is deeply tied to our fight-or-flight response. If you force a stretch, your body tightens up to protect the joint. Passive poses with structural support bypass that panic switch, allowing genuine structural release."
Yoga educators echo this sentiment, emphasizing that accessibility is the key to consistency. By removing the performance aspect of yoga—where touching the toes or achieving a specific shape is the goal—practitioners can tune inward and honor their body’s daily fluctuations in mobility.
Implications: Restoring Mobility and Ease in Daily Life
The adoption of passive hip-opening sequences carries significant implications for physical longevity, athletic performance, and everyday comfort.
Improved Posture and Gait: Releasing chronic tension in the hip flexors naturally aligns the pelvis, reducing compensatory strain on the lower back and knees during walking and running.
Enhanced Athletic Recovery: Athletes who integrate passive stretching into their post-workout protocols experience reduced DOMS (Delayed Onset Muscle Soreness) and a faster return to peak performance ranges.
Stress Reduction: Because the hips are widely considered a physical storehouse for emotional tension and stress, slow, breath-led passive routines often double as nervous system reset buttons.
6 Essential Passive Yoga Poses for Tight Hips
To experience these benefits firsthand, integrate this targeted, prop-supported sequence into your daily routine. For this practice, gather a yoga strap (or bathrobe tie) and a bolster, foam roller, or folded blanket.
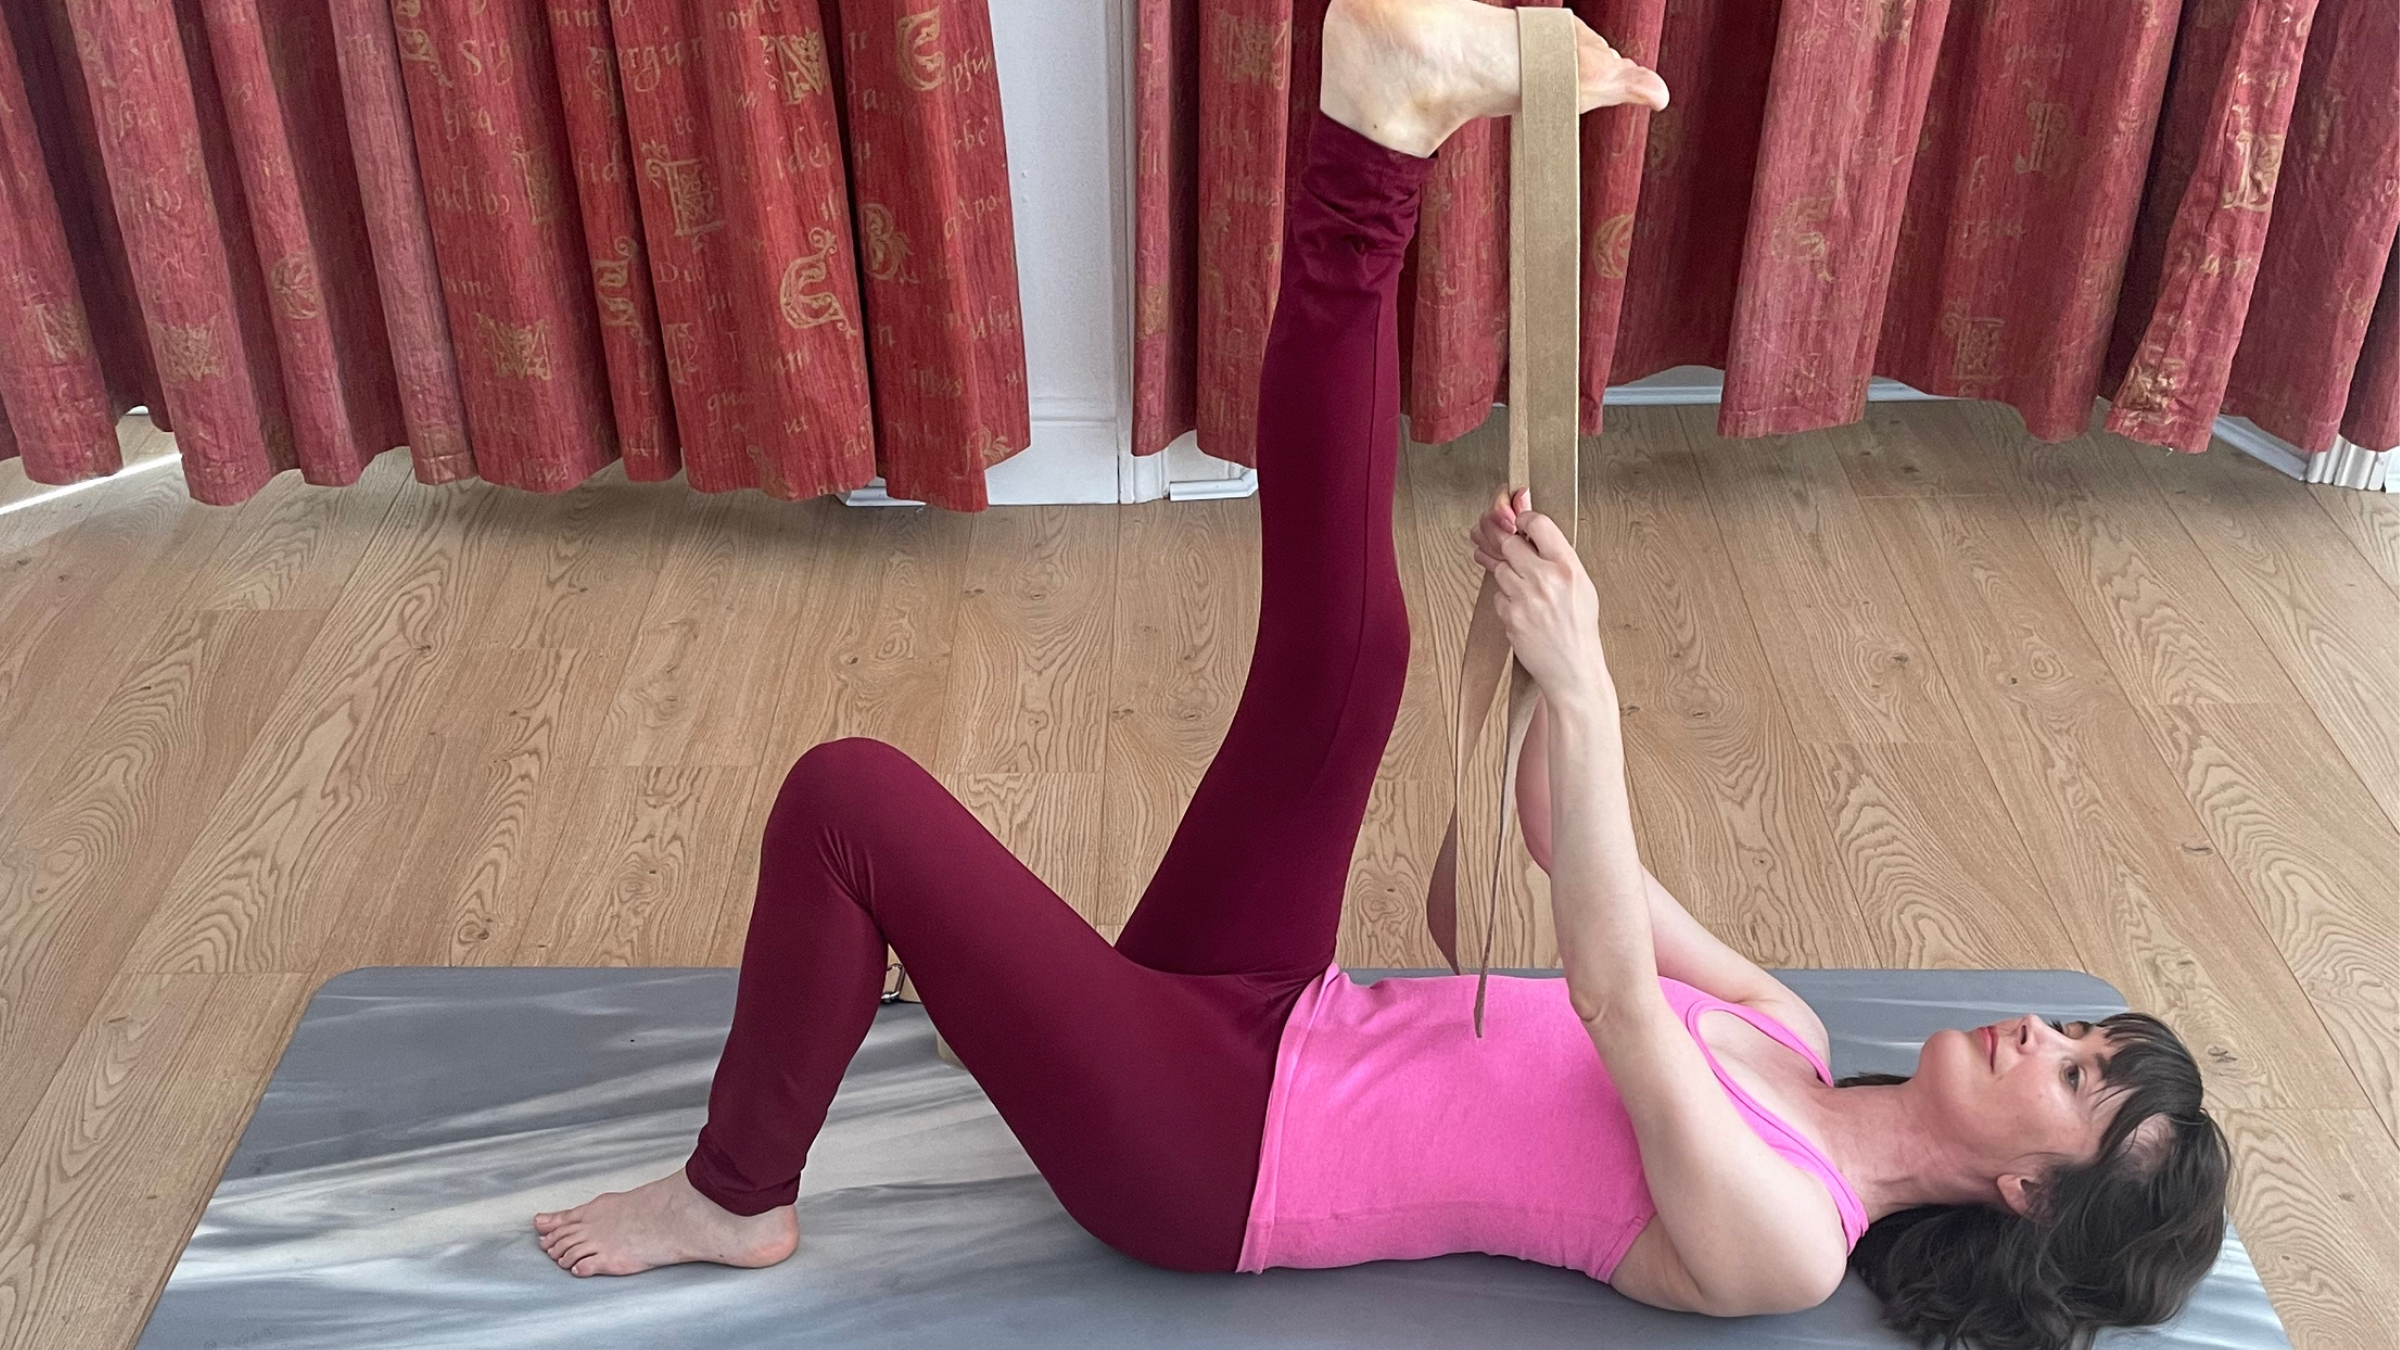
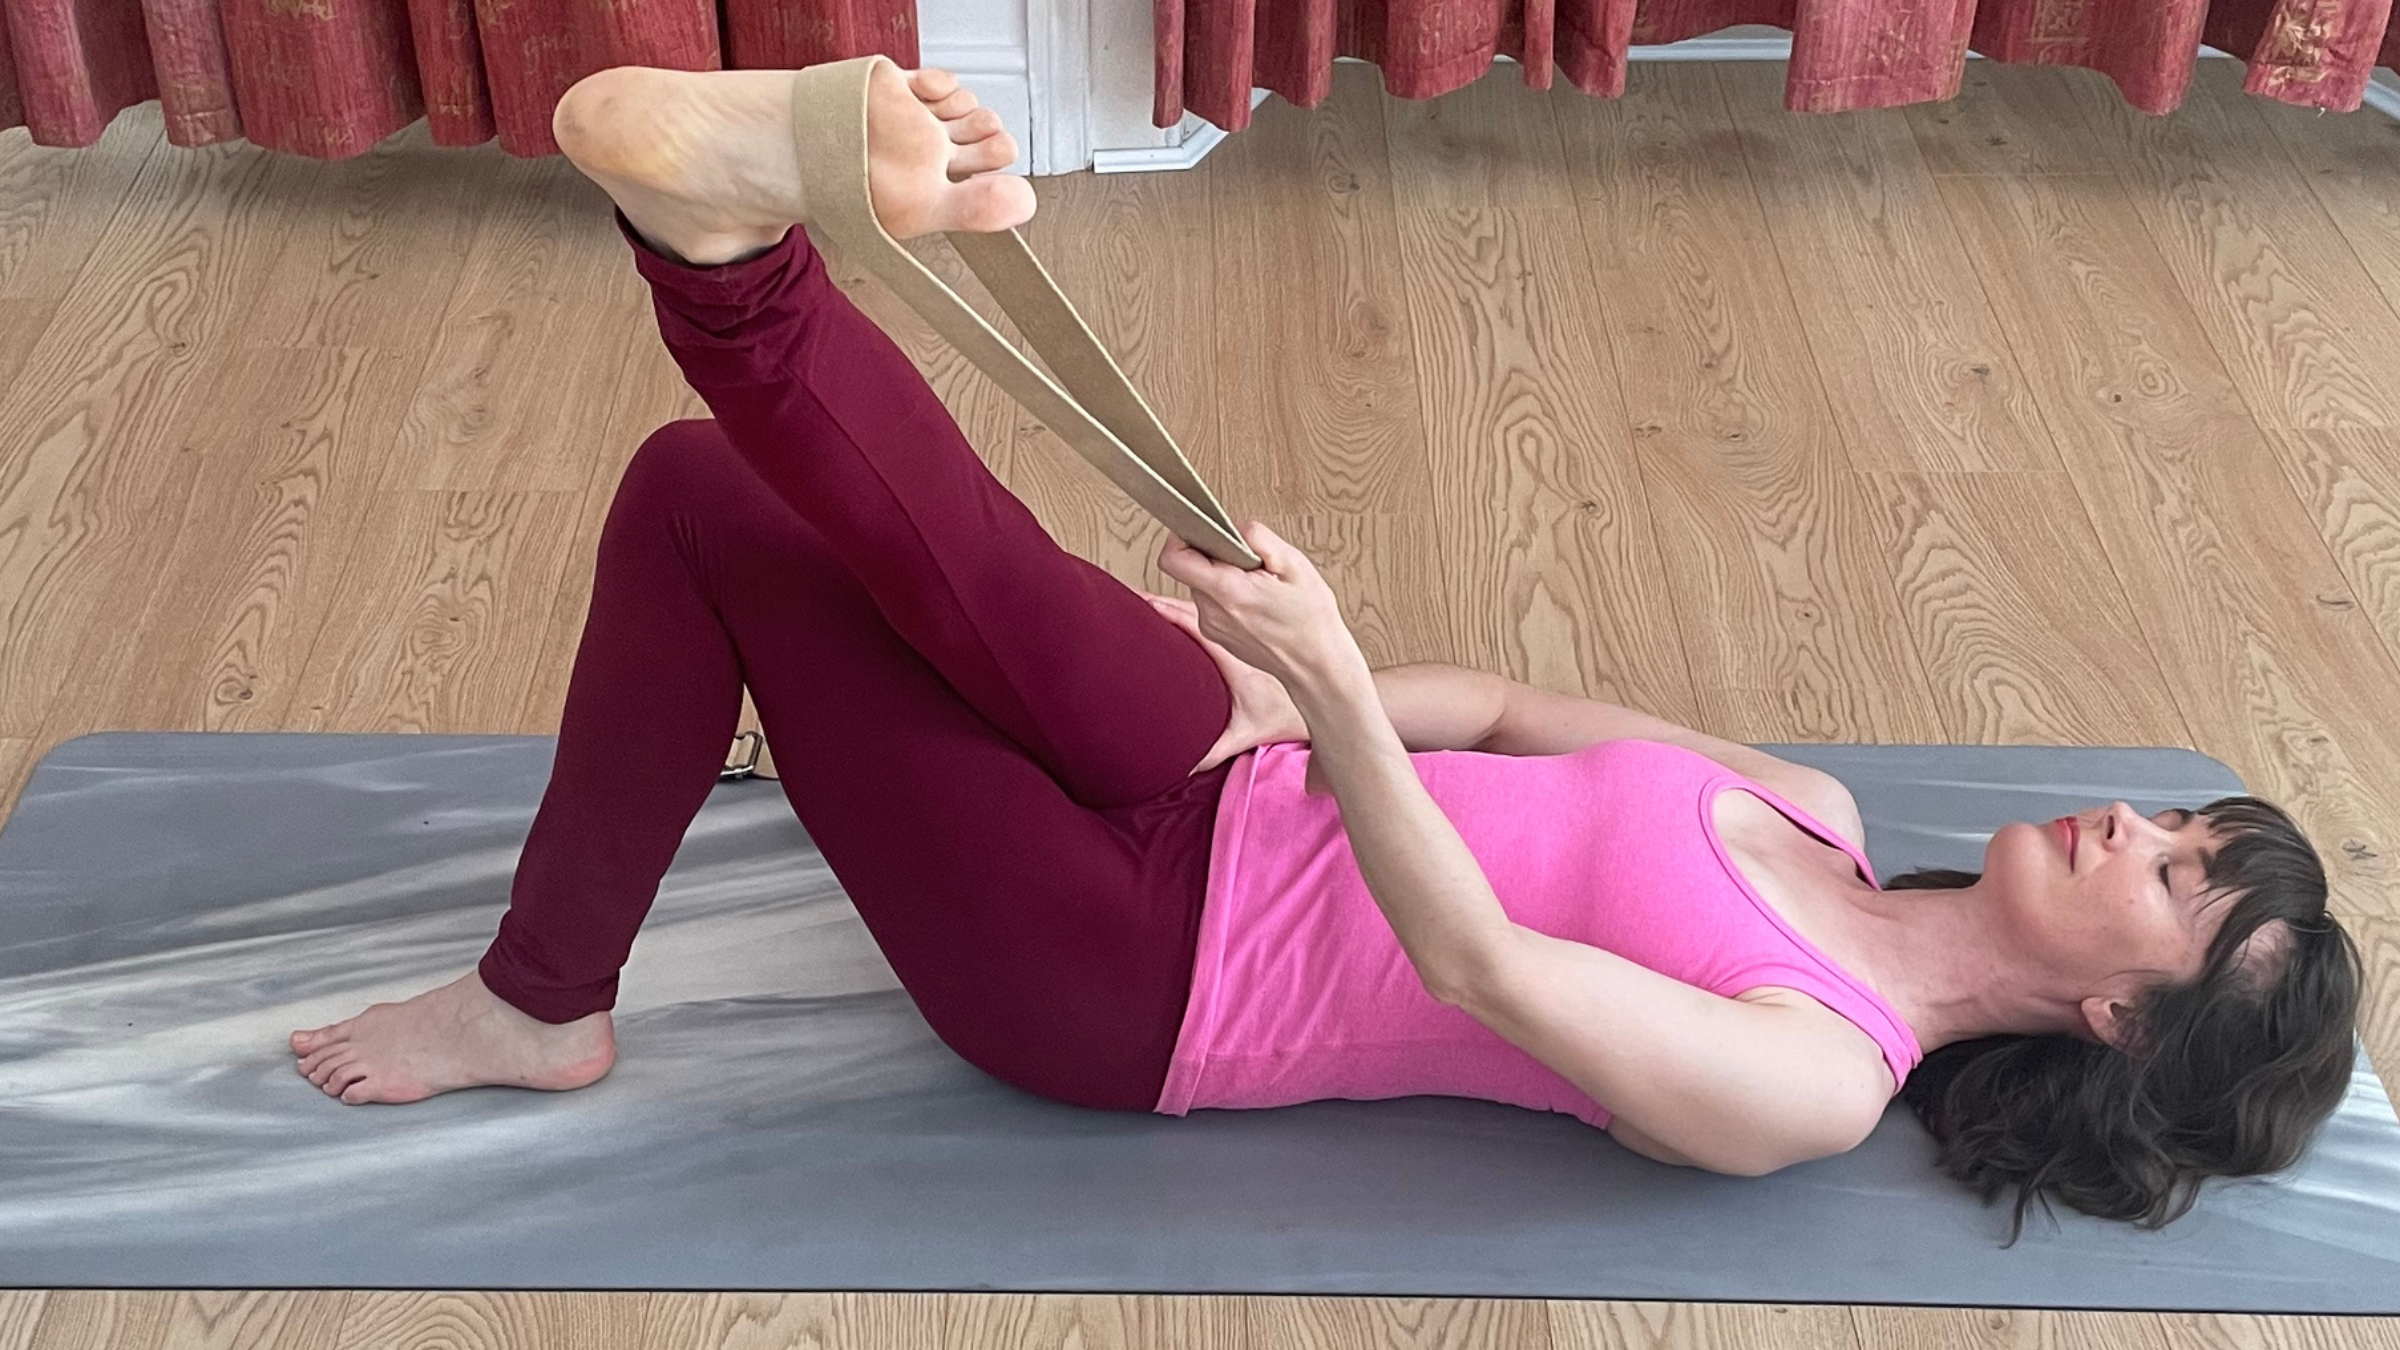
How to do it: Lie on your back with your knees bent and both feet flat on the mat. Draw your right knee toward your chest, loop a strap around the ball of your right foot, and straighten your leg toward the ceiling. Maintain a relaxed grip on the strap, letting your shoulders melt into the floor. Allow your leg to move organically—bend and straighten it slightly or draw small circles with your foot. Keep your left knee pointing skyward. Hold for several steady breaths.
Target Area: Hamstrings and upper calf.
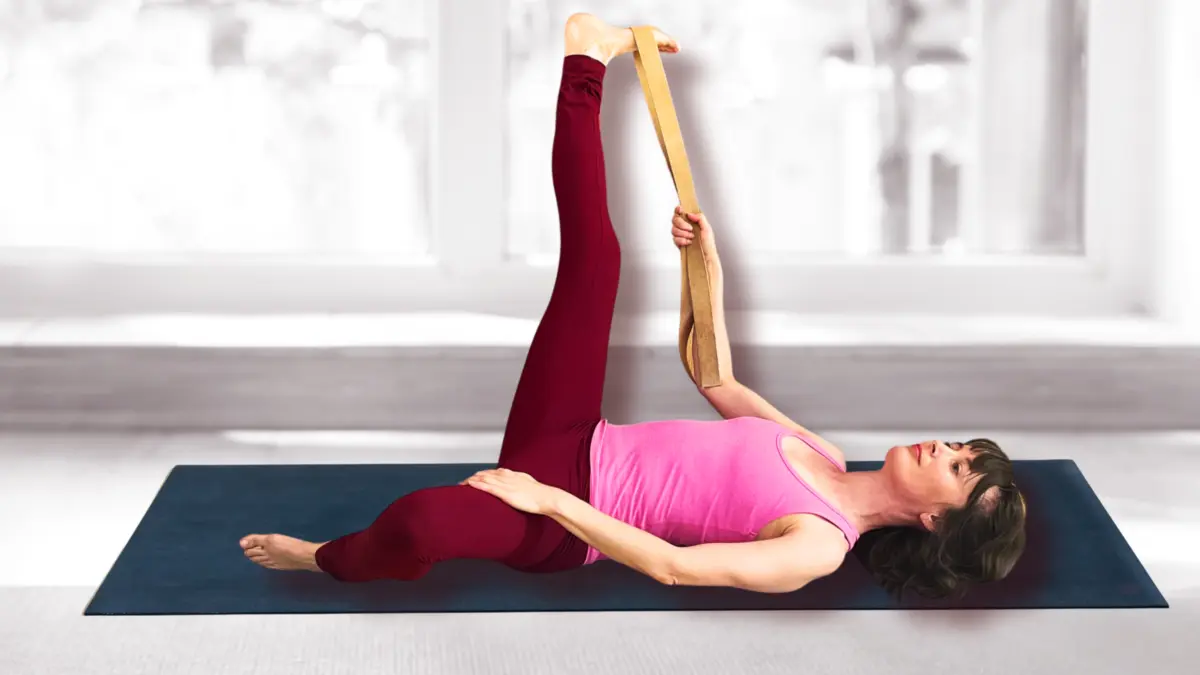
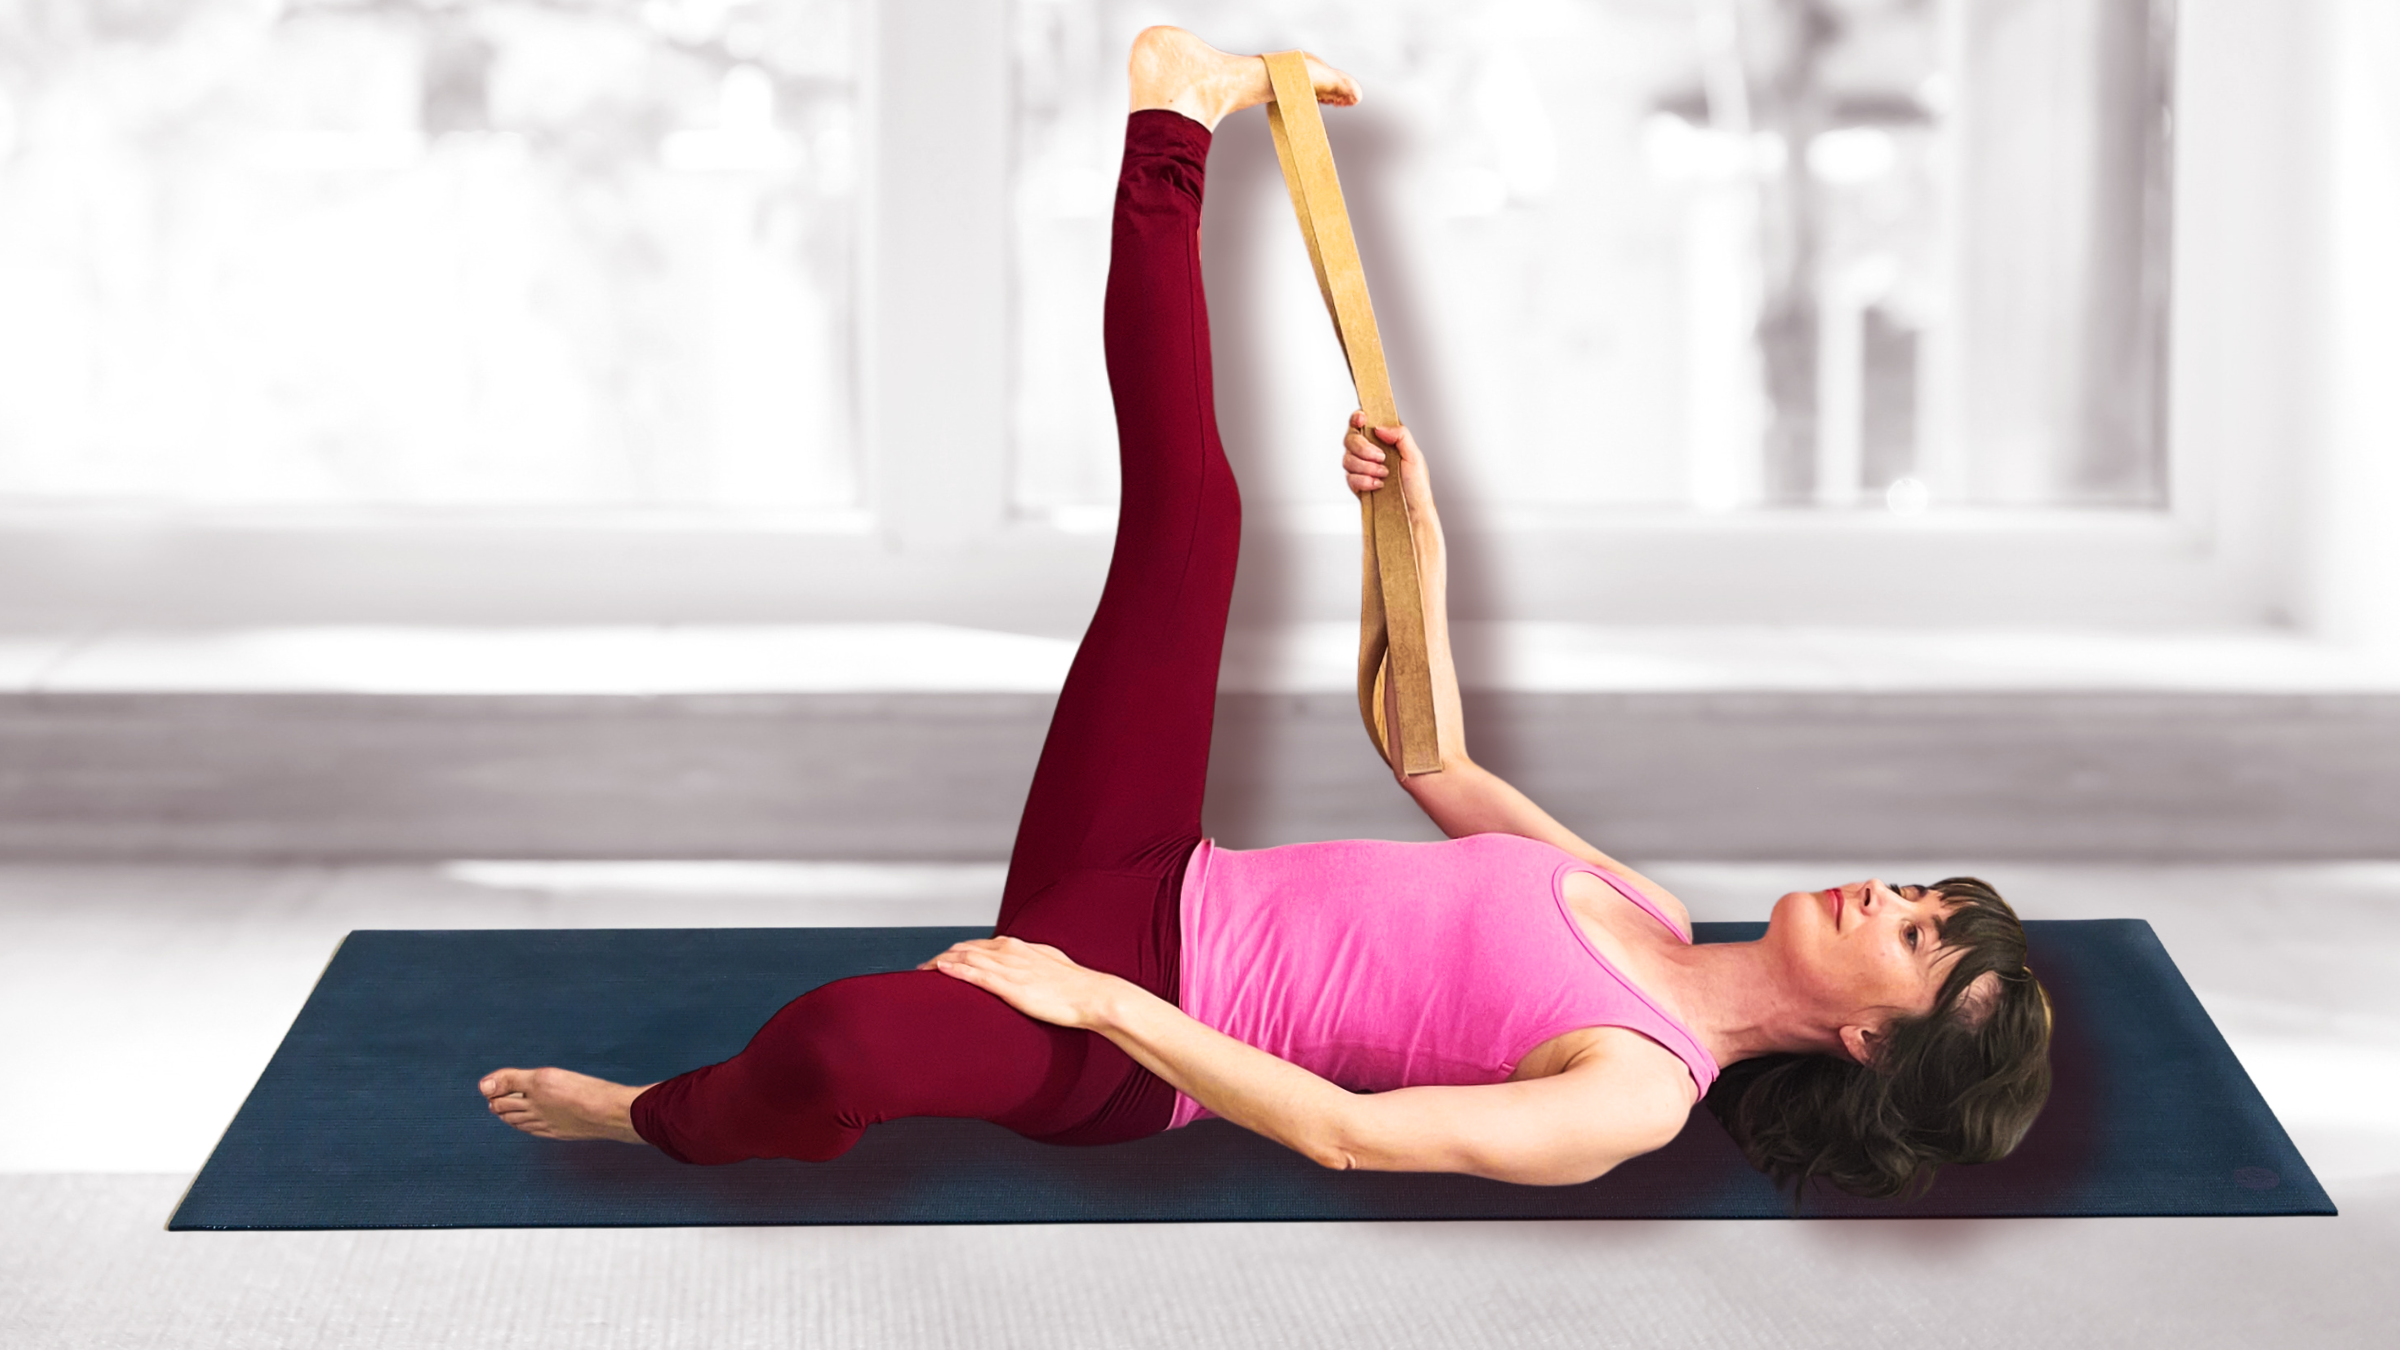
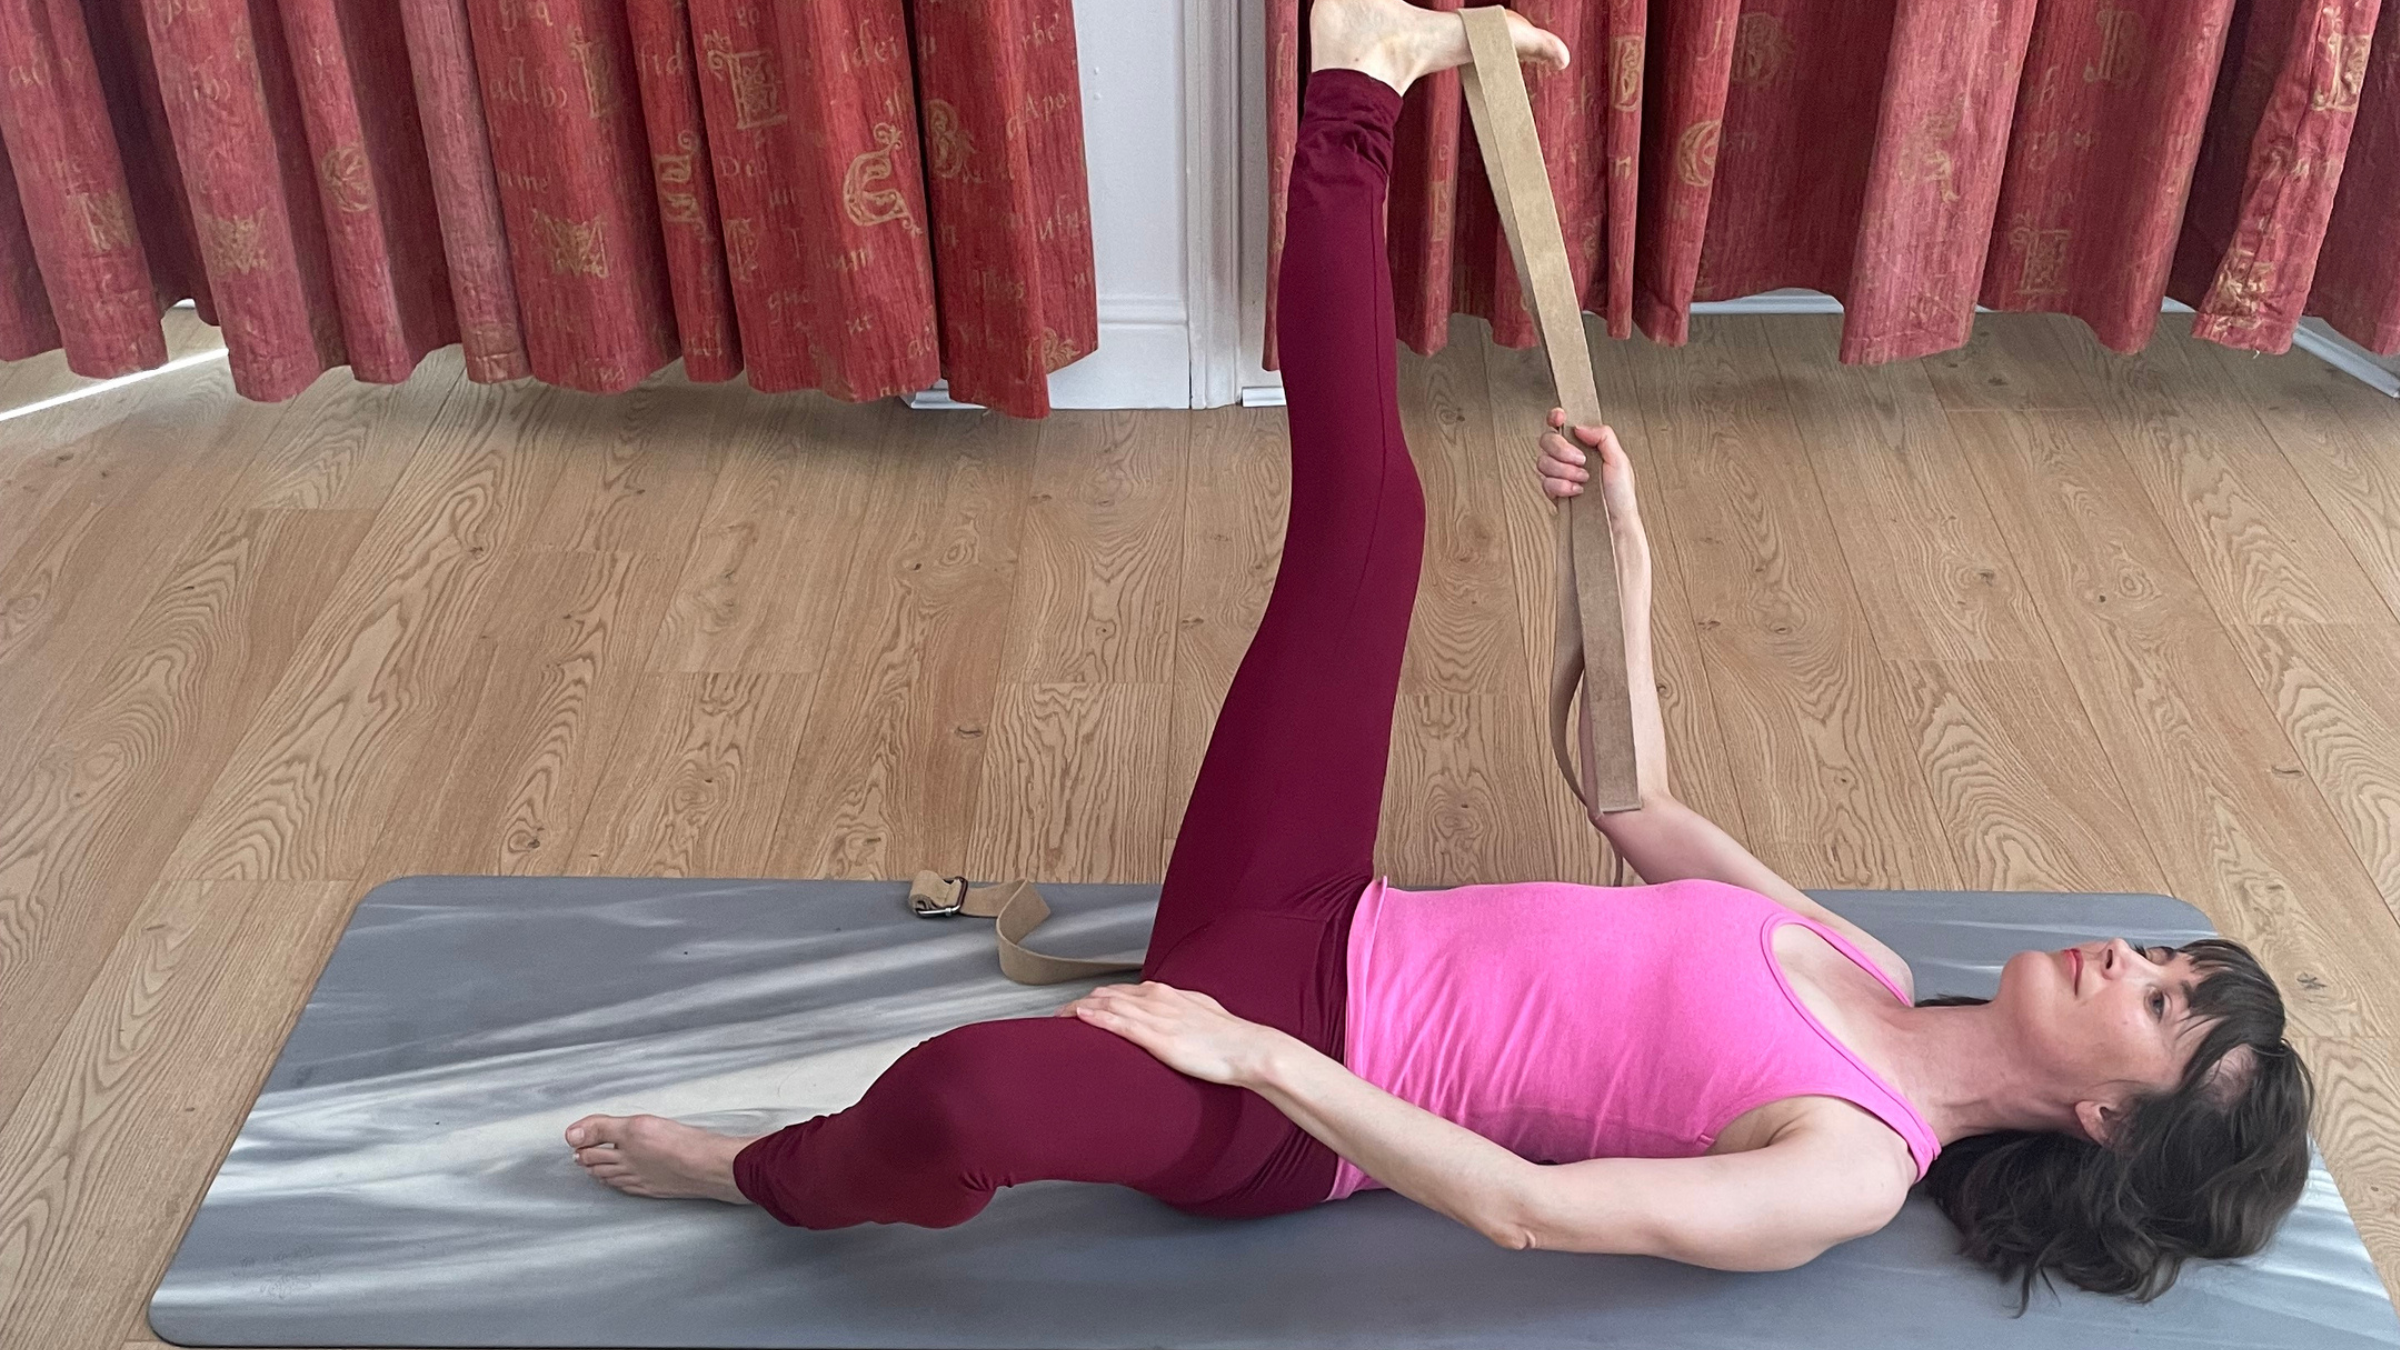
2. Reclining Hand-to-Big-Toe Pose (Variation 2)
How to do it: From the first variation, roll onto the outer edge of your left foot and let your left knee butterfly open to the left. Take both ends of the strap in your right hand and slowly guide your right leg out to the right side as far as comfortable, ensuring your left hip stays anchored to the mat.
Pro Tip: If your inner thighs tend to cramp, gently pulse in and out of the stretch a few times before settling into stillness. Hold for several breaths, return to center, and switch sides.
Target Area: Inner thighs (adductors) and groin.
3. Reclining Hand-to-Big-Toe Pose (Variation 3)
How to do it: Return to the starting position with your right leg lifted via the strap. This time, grasp both ends of the strap with your left hand. Keeping your right hip heavy on the mat, cross your right leg across your body toward the left. For a gentle stretch, let your right leg rest on top of your bent left leg; for deeper intensity, guide your right foot toward your left shoulder without lifting your right hip. Hold for several breaths, release, and repeat on the left leg.
Pro Tip: If you feel pinching in the outer hip, ease the leg slightly further away from your torso.
Target Area: Outer thighs, IT band, and gluteus medius.
4. Reclining Cow Face Pose
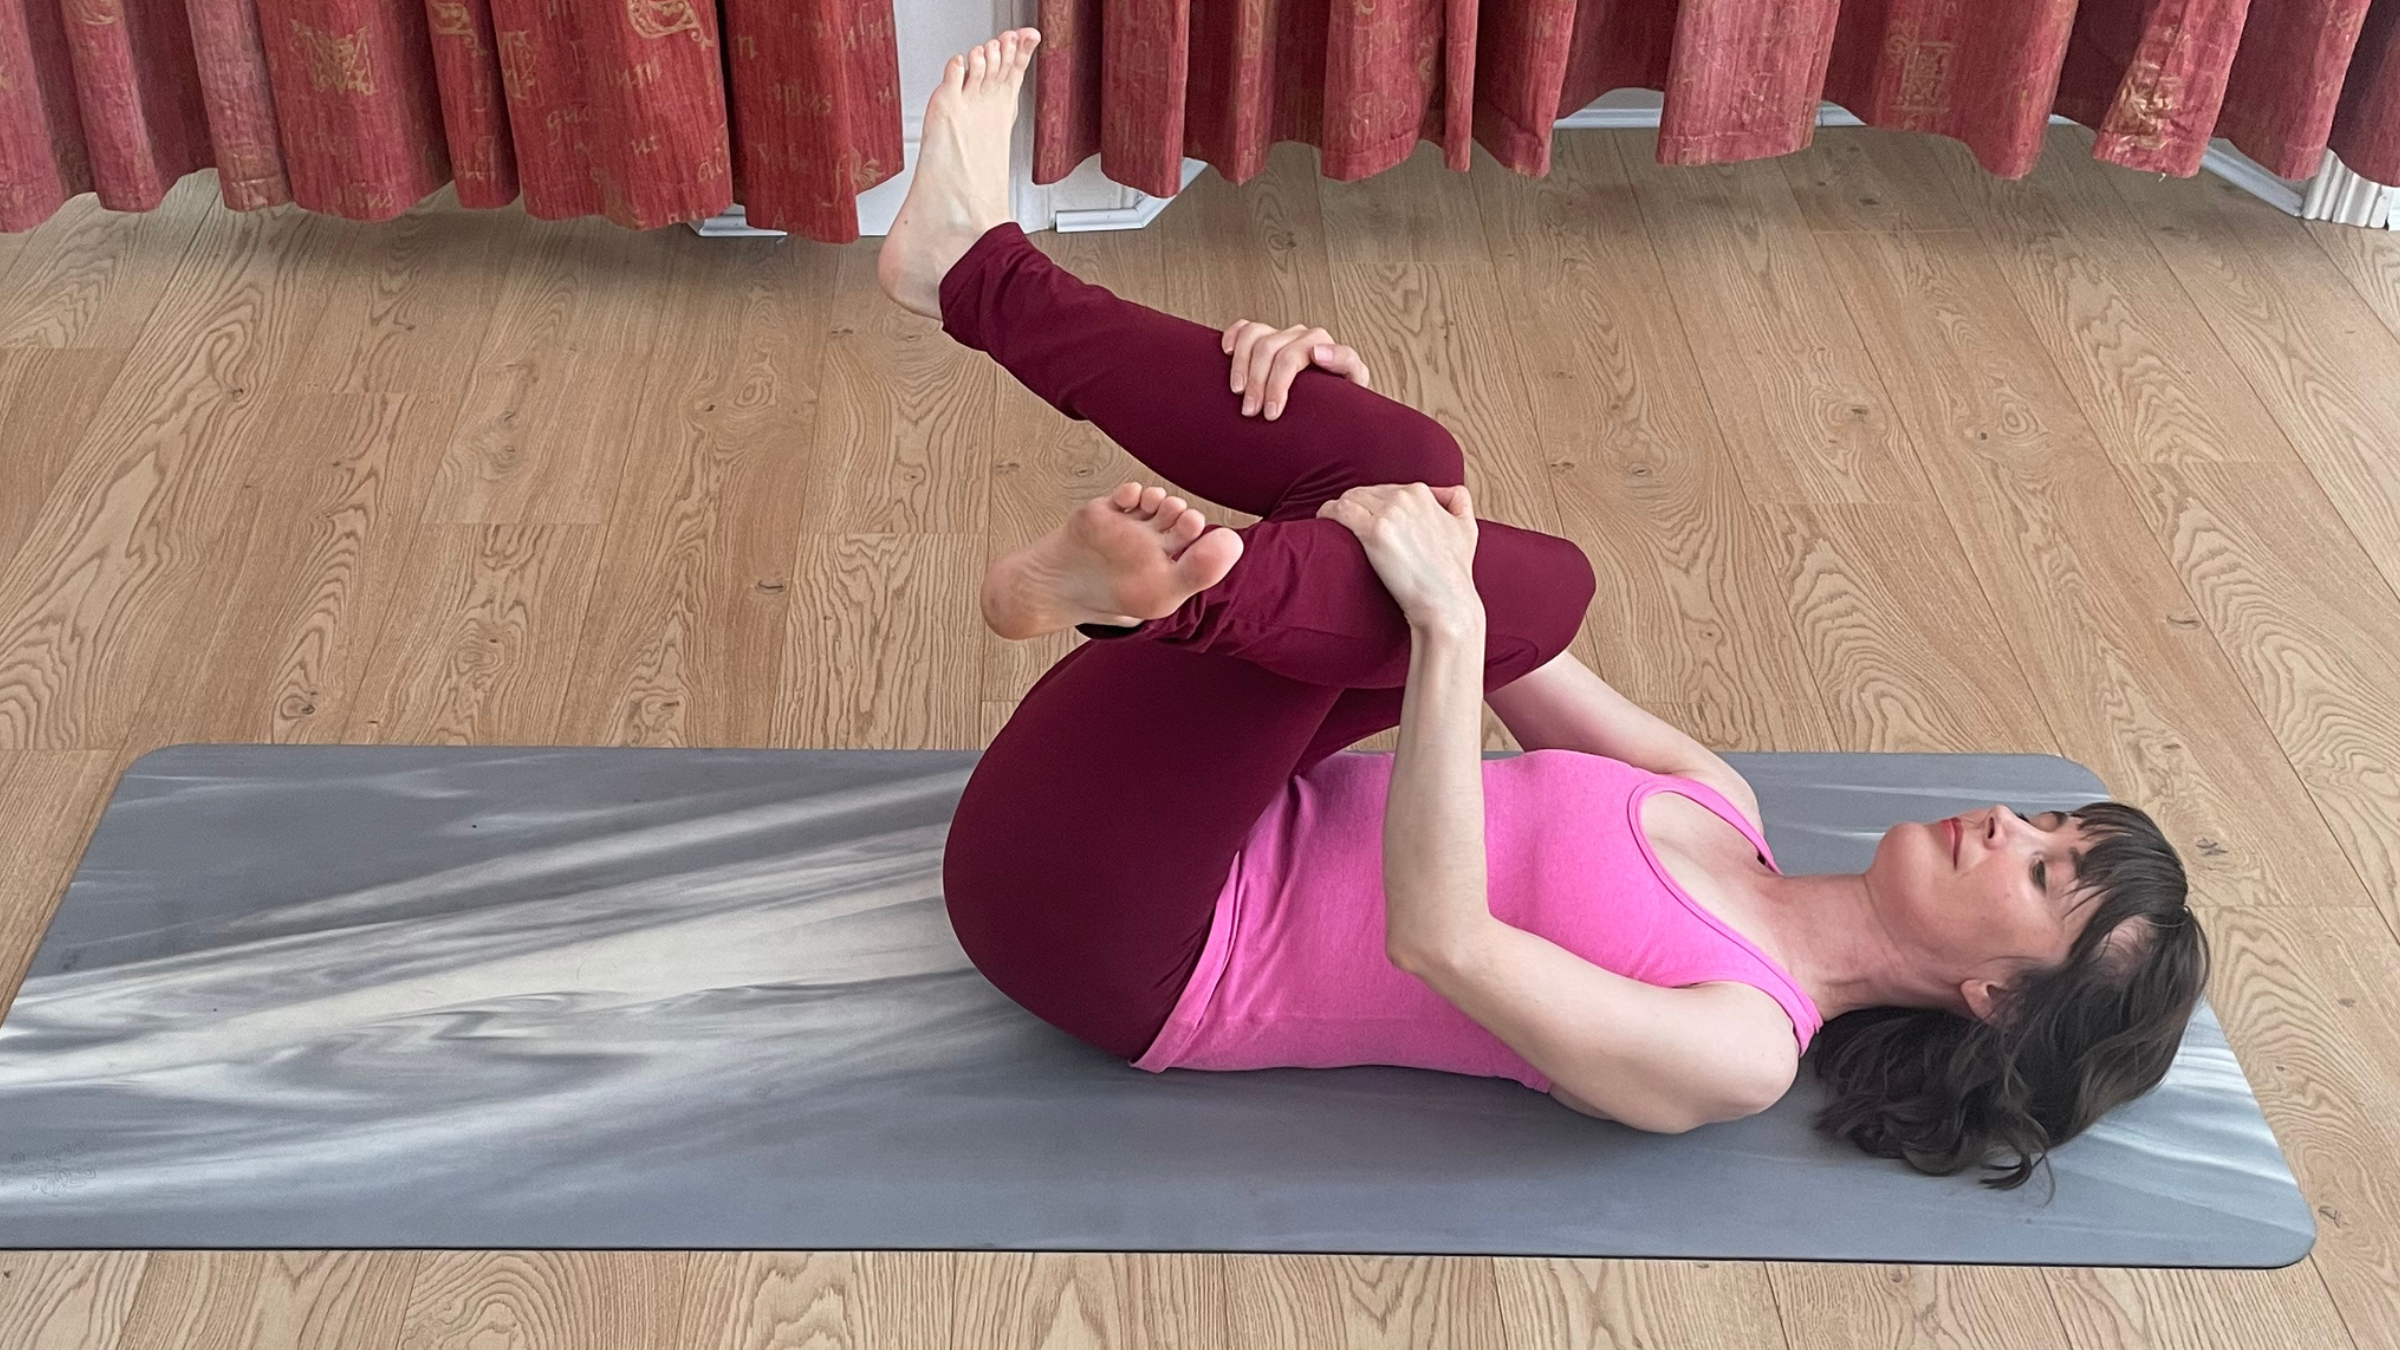
How to do it: Lie flat on your back with knees bent and feet planted. Cross your right thigh tightly over your left thigh like you’re sitting cross-legged in a chair. Reach for your knees, shins, or ankles, and gently draw your legs inward toward your chest. Breathe deeply into the outer hips, hold for several breaths, uncross, and repeat with the left thigh on top.
Target Area: Deep rotator muscles of the hip and outer glutes.
5. Reclining Twisting Eagle Pose
How to do it: Transitioning from Reclining Cow Face Pose with your right leg crossed over your left, lower both crossed legs toward the left side. Note: Place a bolster, block, or stack of pillows underneath your bottom leg for ultimate comfort and structural support. Extend your arms out to a "T" shape. Press your left arm into the floor to gently rotate your chest toward the ceiling, gazing upward or toward your right hand. Hold for several breaths, use your core and arm support to return to center, uncross, and switch sides.
Target Area: Spine, outer hips, and thoracic mobility.
6. Half Wind-Relieving Pose Variation
How to do it: Lie on your back with knees bent and feet flat. Press into your feet to lift your hips slightly, and slide a folded blanket, block, or foam roller directly beneath your sacrum (the flat bone at the base of your spine). Draw your right knee into your chest. You can either keep your left foot planted on the mat or gently extend your left leg straight along the floor if your lower back permits. Allow gravity to decompress your lower spine and hip flexor. Hold for several breaths, then switch sides.
Conclusion
When your practice concludes, do not rush to stand up. Instead, sprawl out completely in Savasana (Corpse Pose) or any comfortable resting shape for two to three minutes. Observe the physical landscape of your body. Notice if a profound sense of ease has settled into your hips, and consciously allow that relaxation to radiate upward through your spine and outward through your limbs. By trading aggressive force for passive support, you can finally invite long-term freedom into your body’s most heavily worked joints.